Showing posts with label Airfix. Show all posts

Tuesday, 11 July 2023

Airfix Gun Emplacement

This is a post about the famous Airfix Gun Emplacement, or at least what's left of the one I had many years ago.
Airfix Gun Emplacement

Actually, there isn't much left at all, just the two bunkers, with the base and match-firing gun long gone.  Furthermore, the octagonal bunker was at some point converted into a pillbox by cutting some rough holes in the sides, but this was never very satisfactory.  Consquently I thought it was time for an upgrade.  And here it is.
Gun Emplacement Bunker conversion

For this small project I decided to have the pillbox sitting in a base, which is made of a couple of layers of polystyrene foam.  Once shaped, the base was covered in rough sand, painted in earth tones and textured with flock, adding cloves from the kitchen spice-rack cut down to look like tree stumps.

Airfix gun emplacement pillbox conversion
In addition, I constructed some 'concrete' walls around the entrance, textured to look as though wooden shuttering had been used to form them; a technique I believe the brutalist French architect Corbusier was very fond of, as were the German occupiers.  In my case, this effect was done by gluing wooden coffee stirrers to a thin foam core and then painting them to look like concrete to match the repainted pillbox.
Airfix gun emplacement pillbox conversion
The pillbox actually lifts off so figures can be put inside.  Furthermore, considering the gun emplacment set is not being made any more (at least at the time of writing), I may yet construct my own scratch-built version of the entire model, built around this remaining element.

Wednesday, 4 April 2018

French Generals

I've not posted for quite a while but that doesn't necessarily mean I've been idle on the wargames front.  Although I have.  A bit.  Anyway, here are some figures I completed recently.

They are three 20mm Minifigs French generals that I must have bought some time in the 1980s and which have been lying around undercoated for decades.  So, as I've been painting 20mm French Napoleonics recently I thought I'd get these finished too.
Acceptable casualties.
Having improved my horse painting (in my opinion) over the past few years with my efforts on dragoons and cuirassiers, etc., the horses were straightforward.  However, for these guys I wanted to have them on round bases (not WRG 1685-1845 standard general bases, note) with something else going on to distract from what are fairly dull figures (apart from the paint job obviously).

For the first one shown I finally managed to work in a casualty figure from my first ever box of Airfix Napoleonic French (c. 1976), just lying there whilst the general rides by nonchalantly.

The next one is probably the dullest figure in terms of pose (ignore the hat), so I painted him as per the illustration on the dust cover of my trusty 1977 reprint of Jack Cassin-Scott's Uniforms of the Napoleonic Wars in Colour 1796-1814, which apparently was Marshall Bessieres' getup.
You want it in green and red?  Why, anything you say colonel.
For this one I decorated the base with some gravel and behind the figure is a tree-stump made from a clove I found in a takeaway curry (I've got a few of those drying in my bits box now).
Note clove pretending to be a tree-stump.
It was a bit bendy even after drying so it has had a good few coats of paint to stiffen it up.  Also, I had thought to add some foliage to it but then considered that maybe there would be just too much green on this one.  It's amazing how much you can write about something you found in a curry.

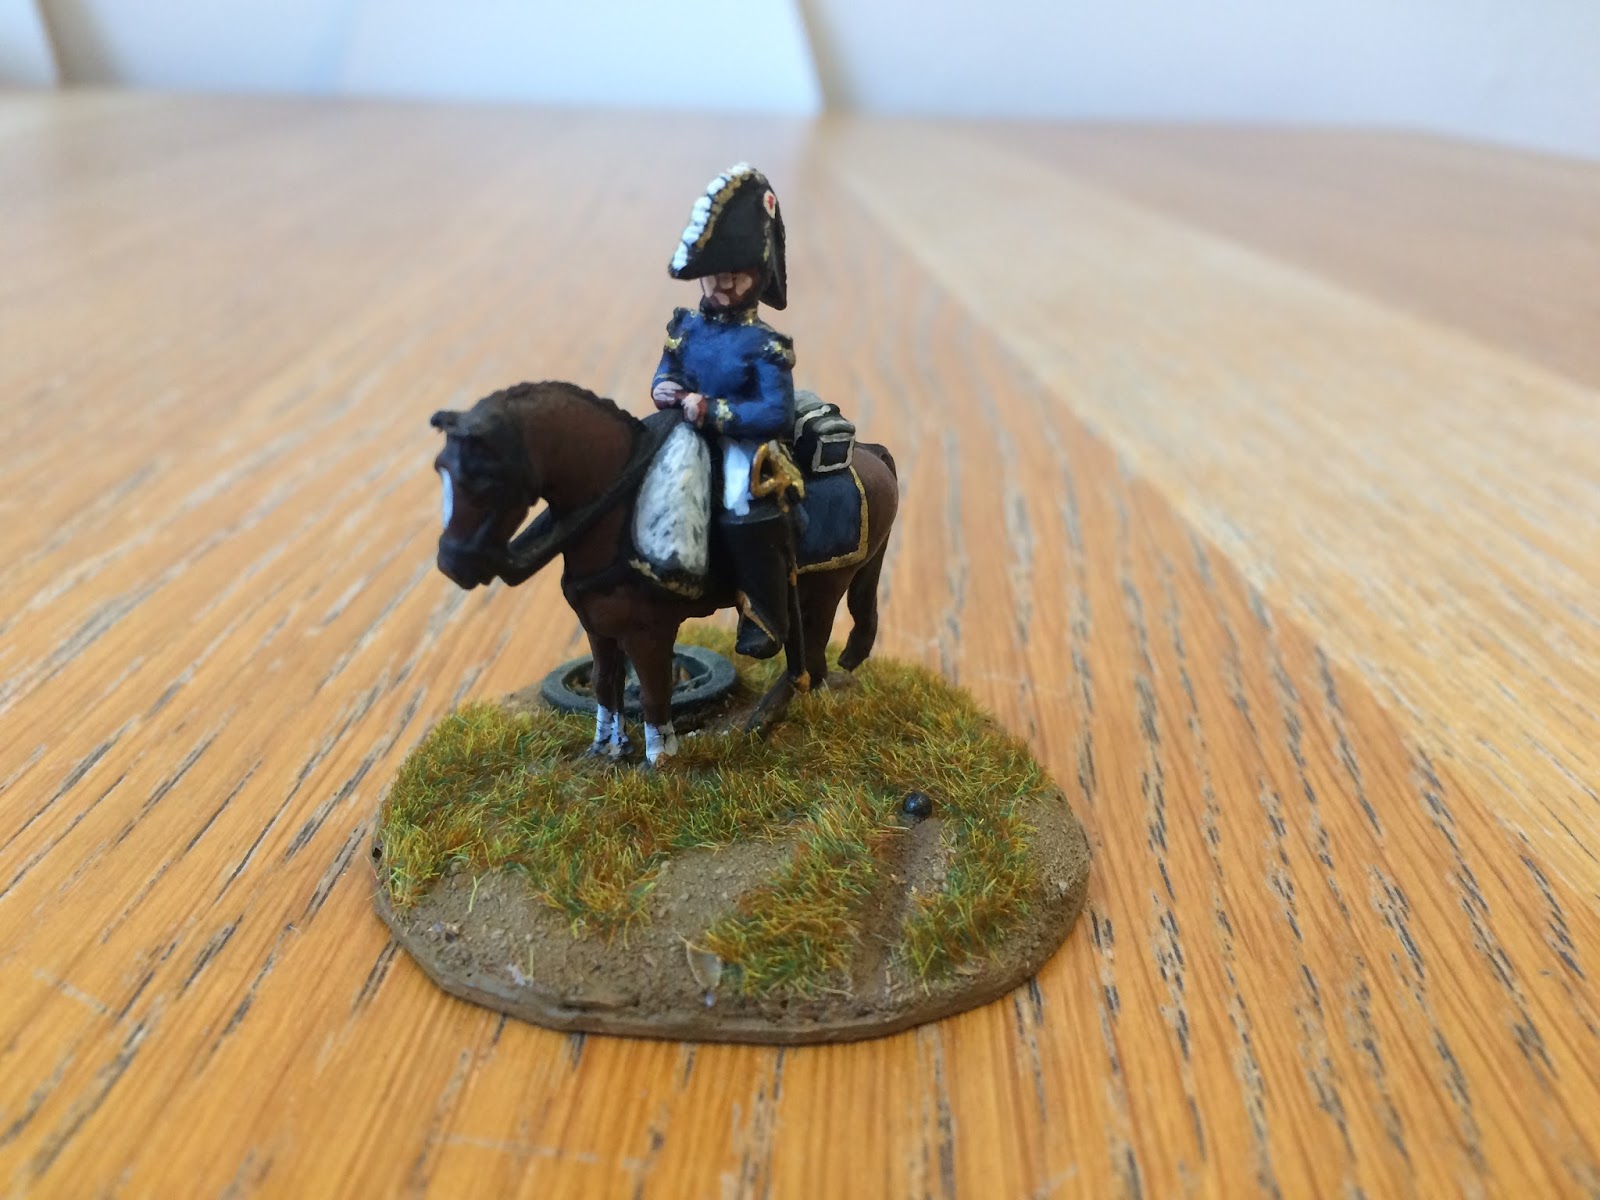
The last figure is more soberly attired and sitting calmly on his horse beside a wheel from a (1970s) Airfix cannon (the one that came off the cannon on a dragoon base in fact).
Three wheels on my waggon... no wait, here it is.
However, displaying remarkable sangfroid the general is ignoring something else going on on the other side of the base, which is slightly more alarming.
Well pick it up and chuck it back then.
As you can see, a large cannonball has furrowed the ground just next to his horse.   This was made using one of those round headed pins you used to get with new shirts.  I cut most of the pin off leaving about 5mm so I could secure it into the base.  A spot of black paint and some light dry-brushing with steel finished the job.

Saturday, 25 February 2017

ACW Positional Defence (2)

This is the after action report (AAR) from an American Civil War (ACW) wargame we played near the end of 2016 before various business trips, Christmas and so on intervened (hence the long gap since I last posted here).
The aim was to playtest the Principles of War 2nd edition rules (POW2) I'd had on the shelf for about 10 years.  From reading through the rules I liked their apparent simplicity as well as the interesting command and control mechanism, so I wanted to see how they would play out under stress of battle.  I'd also wanted to find an alternative to Neil Thomas' nineteenth century rules we'd tried earlier in the year which we found too simple.
Positional Defence (2).  Confederate attack.
Alert readers will know that this scenario comes from Charles S Grant's excellent book "Scenarios for Wargames", which we have used a few times in recent years. In fact the first AAR I ever posted on this blog was Positional Defence (1), which coincidentally was also an ACW game.  In the intervening years all of our ACW figures have been rebased (as recounted in detail elsewhere on this blog).  As you will see these are the classic 20mm Airfix figures that we've had for nearly forty years, and still going strong.
Union starting positions
The scenario has the "Red Force", in this case the Confederates, attacking a smaller Union force in a defensive position on high ground with a village at the centre. The forces were adapted from the scenario in the book so the Confederates had seven infantry regiments and three guns, with the Union side having four regiments and two guns.  As you can see from the map, the Union forces were spread thinly with one regiment and gun on each hill, one in the village and one regiment out of sight in reserve behind the village.
Confederate attack on left flank develops
The Confederate plan was quite simple: to wear down the defenders with artillery fire whilst the infantry advanced on both flanks across the open ground towards the objectives.  Initial bombardment was on the infantry in the village, which despite being in hard cover, were rapidly forced out of the houses by incessant artillery fire (and rubbish die throwing).  This allowed the rebels to move forward quickly with few casualties.
Confederate attack on Union right
The lack of effective defence in the centre meant that the rebels could bring up their guns and after a short exchange the Union regiment on the right-hand hill started to withdraw.
Right flank falling back, artillery about to be destroyed
Furthermore, despite some spirited firing, the artillery on the right was worn down rapidly and destroyed, leaving the right flank practically open.
Union forces pushed off hill on the right with reserves trying to move up
Meanwhile, on the left, the rebels were using the woods as cover and were moving up rapidly.
Situation on the left
The battery on the left was mainly engaged in long range counter battery fire but was quickly weakened.
Rebels in the woods
The rebels continued to push hard on the left and the incessant bombardment meant that the Union's last remaining battery's strength was reduced to zero.
Not looking good for the Union
The rebels then moved into the contact against the isolated Union regiment on the left whilst the Confederates climbed the hill on the right.
Confederates capture hill on right, attack hill on left
On the left the sole remaining Union regiment was attacked frontally whilst another rebel regiment contacted it in the flank.
Union regiment outnumbered
However, the Union regiment was able to defeat the rebels to the front and then turn its attention to the flanking force.
Rebels run away.  Right, who's next?
Union regiment combats flanking force
Amazingly the flanking rebel regiment was also repulsed.
Ha!  Take that!
Unfortunately this success was only temporary as the rebels in the woods moved up and attacked again.
Persistent Rebels
However, by now it was all over for the Union as the Confederates controlled the right hand hill and the scenario's main objective, the village.
Rebels to the right of me, Confederates on the left... here I am...
So at that point we called it a day.  The Union side was comprehensively beaten and it appeared that very little could be done to stop the Confederates advancing to contact, sweeping the weaker Union forces away.

As with all of CS Grant's ideas, the scenario was pretty good but perhaps the forces could have been slightly better balanced to make more of a fight of it, although that might have been more to do with how we chose forces rather than the scenario itself.

As for the POW2 rules they worked fine and were easy to follow.  Unlike some sets of rules they don't bother with a lot of 'fluff' but get straight to the point in a structured way, even laying out the rules in the same order as the move sequence, which some well known sets of rules don't seem to bother with.

However, there was something slightly 'flat' about them and I certainly felt that the rules did not give the defenders the expected tactical advantages from cover or elevation that would enable them to even slow the enemy, let alone stop them as they advanced inexorably in the open to contact.

That said the POW2 rules certainly performed better than the very simple nineteenth century Neil Thomas rules so I haven't given up on them just yet.

Friday, 13 May 2016

French Artillery

It's nice to be back painting again and here is what I finished last week, some French Napoleonic artillery.
Esci cannons with Airfix crew
These are 20mm plastics and the guns come from the Esci foot artillery set, which actually has guard artillery crew.  Being a bit more down to earth I prefer to have fewer rather than more guard units and therefore I paired the guns up with some Airfix (line) artillery crew.
12pdrs
The Esci set is quite generous and comes with two normal cannon (12pdrs I think) plus two howitzers.
The howitzer
I had managed to misplace one of the howitzer barrels over the years (it turned up just after I'd completed all these, of course) and so I used a cannon from the Airfix set.  The Airfix gun carriages are far too small and have the wrong number of spokes on the wheels, amongst other problems, but the gun itself when put onto the Esci carriage doesn't look too bad.
Airfix cannon on an Esci carriage
As the cannon I used was from the Airfix set I nostagically crewed this piece with the few figures I had remaining from the the very first Airfix artillery figures I got, from sometime back in the 1970s.  Not many of them left but they still paint up OK (I had refurbished the remaining marching figures as an infantry unit previously).

The guns and crew are on 40mm x 60mm bases and my usual basing technique of coarse shelly sand painted in Revell Dark Earth, with a bit of dry brushing and then selective flocking, completed them nicely.

Saturday, 7 May 2016

There is Nothing Like a Dane

I've only been to Denmark once, and that was a school trip when I was 17 where I ended up in hospital with food poisoning, meeting a number of charming Danish nurses in the process... Anyway, back to the real world (sadly).
On the contrary, these are exactly like Danes
We managed seven wargames last year, which was pretty good for us and I'm hoping we can fight more than that this year.   If you were counting I feel I should confess one of them from last year wasn't blogged because I lost the camera on the way home so nothing survives of it apart from the sketch-map (I'm thinking to rerun the scenario again this year).  Anyway, here is the game we played last weekend.
Battle of Oeversee
The scenario was taken from Neil Thomas' book Wargaming Nineteenth Century Europe 1815-1878 and was a recreation of a rearguard action between retreating Danes and advancing Austrians, the Battle of Oeversee (Second Schleswig War, 1864).
The real battle was an incident in relation to the intractable 'Schleswig-Holstein Question', the solution to which Palmerston remarked was only understood by three people: Prince Albert (who was dead); a German professor (who went mad thinking about it); and Palmerston himself, who claimed he'd forgotten it. In fact the book gives an excellent overview of the situation and the political background to the 'question', as well as the lead up to this particular encounter.
Initial Danish positions with Colonel Müller leading
In essence, the Danes, after being defeated by the Austrians at Jagel-Overselk, were trying to retreat northwards to a line of fortifications, the Danevirke.  A rearguard of around 3,000 men under Colonel Max Müller was tasked with holding up the Austrian army (comprising an advance guard of around 4,000 troops), which, after being bested during the Italian Wars of Independence five years previously, a) now relied heavily on the bayonet attack and b) had much better artillery that was used more aggressively.
View from behind Danish starting positions
The Austrian's objective therefore was to force the Danes off the road and to disrupt the orderly withdrawal of the main Danish army.  The scenario gave the Austrians two bronze rifled guns and the 9th Hussars to start with, to be reinforced progressively by Jägers, skirmishers and three units of average infantry.
Austrian 9th Hussars ford the River Trenen
The Danes on the other hand were to have four units of 'levy' infantry (due to low morale) plus an understrength gun.  However, reinforcements comprising another unit of infantry and some artillery was allowed for (in the real battle it never arrived).
Austrian infantry - looking suspiciously like Airfix French Foreign Legion...
The Austrian's scenario objective therefore was to ensure that there were no Danish units within 12cm of the road by the end of turn 10.  The rules used were those set out in Neil Thomas' book, which are fast-play and simple.
Austrians start to pour across the river as the Danes form up
The initial moves allowed the Danes to form up in line across the road and to move through the woods in order to extend the line.  The Austrians advanced across the river rapidly, with the intention of decisively steamrollering the jittery Danes at bayonet point.
Disgraceful evidence of fly-tipping encountered in the woods
Unfortunately for the Austrians there were a number of problems.  The Austrian artillery placed on a hill next to the river was just out of range of the Danes, who, wisely, decided to stay put and not advance into said range.  Secondly, the Austrians, conscious of the game's time limit, were advancing piecemeal over the river to attack straight off the march.  Thirdly, the Danes' reinforcements turned up nice and early (move 3).
Austrians start to deploy, but Danish reinforcements have arrived already
However, despite not being able to soften up the enemy with artillery, the Austrians continued their inexorable advance, hoping to make contact as soon as possible.
Austrians getting closer
As the Austrians advanced their Jägers were able to start peppering the Danes on their left, whom they outranged.  Meanwhile, the infantry and hussars moved into charging range.
Hussars make contact; though half of them didn't get that far
Initiating a charge into the Danes on the right, the hussars lost a significant proportion in the approach but still managed to make contact.  The Danes recoiled, but due to a quirk (or misunderstanding) of the rules the cavalry was not able to follow up immediately.
Danes retire briefly, but cavalry stopped (for some reason)
At that point, the Danes that had been pushed back were able to fire again at the milling hussars and basically wipe them out, mainly due to poor die throwing from the Austrians.
Hussars wiped out: offending die score foregrounded
Meanwhile, some Austrian infantry had made contact with the Danish centre, but again, with a series of brutal die throws the centre held and the Austrian attack faltered.
Austrians faltering
Another round of melee saw the Austrians actually manage to push the Danish centre back, but the attacking infantry was too damaged to follow up.  Again, the Danes who had been pushed back were able to fire into the Austrian infantry who had just beaten them and they were decimated.
Depleted Austrians in centre, about to be blown away
So, with two units lost and the clock ticking down (we were on move 11) it was clear that the attackers were not strong enough to break the Danish line and therefore the Austrians conceded the game.

So, a bit of a frustrating game for the Austrians, and an easier than expected one for the Danes (me).  Overall though, I think our main problem was with the rules.  Neil Thomas sets out clearly his rationale for the rules he produces in his books.  However, for us I think that the rules are generally too simple and sacrifice more realistic mechanics in order to create a fast-play framework.

That said, a frontal attack by hussars against steady infantry is unlikely to succeed in any rule-set, although the fact that the Austrian artillery was out of range at the start was mainly because our table was longer than the set up envisaged in Neil Thomas' scenario.

However, the period is an interesting one (particularly when you compare it to what was going on in America at the same time) and there are a lot of good ideas in the book.  Geoff had spent a good few months preparing and painting his armies (a combination of converted Airfix, Italeri and Zvezda pastics, with some Irregular 20mm figures thrown in) and no doubt we will be fighting some more games from this period this year, though perhaps with different rules.

Saturday, 19 March 2016

More Airfix French Redux

Well, it's been a while since I posted on my blog having been away quite a lot in the intervening period, to Turkmenistan, Gabon, Uzbekistan and Austria if you must know (the last one was a holiday).  However, in the meantime I have not been entirely idle.
So, I've done a bit of painting.  These are 1/72 scale Airfix figures and are in fact the 'infantrymen' you get in the Airfix French Artillery pack.
They've got longer swords than infantry are supposed to have and the usual Arifix 'character' but they don't look too bad once painted up.  The drummer is a standard Airfix French infantry figure.
I should add that the officer is actually the French artillery sergeant that comes with the set, but with a bicorne made out of plasticine.  After I'd taken the photos I noticed a wee blob of blue paint on the end of the bicorne but that's gone now.

Saturday, 29 August 2015

One-Hour Wargames 12: An Unfortunate Oversight

The point of this scenario, taken from Neil Thomas' book One-Hour Wargames, is that the defending commander has been tasked with holding the bridge (here's one (or rather two) I made earlier) but is unaware that there is also a ford in the vicinity which may allow him to be outflanked.
Nice bit of planking.
The scenario states that possession of the hill by the end would determine the victor.  This map shows our set-up, with the bridge on the left and the ford on the right.
OHW 12: An Unfortunate Oversight
This game pitched Napoleonic French against a ragbag of Coalition forces, comprising mainly Prussians with some British thrown in for no adequately explained reason. This was the initial setup, with two regiments of French foot trying to cross the bridge, with another two foot regiments plus dragoons and cuirassiers attempting to sneak round and flank the Allies via the ford.
French poised to cross the river at two points
You will notice that the battlefield is actually the reverse side of an old Subutteo pitch with the lines showing though, clearly indicating that this would be a game of two halves.
French infantry plus Mameluke general cross the bridge
As was required by the scenario, the game started with both wings of the French army trying to get across the river as fast as possible.  My scheme was to keep the Allies occupied on the left whilst my cavalry rushed across the ford on the right and grabbed the hill.  At least that was the plan.
French cavalry cross the ford (very old Hinchliffe figures)
However, with surprising alacrity the Allies pushed most of their forces towards the hill leaving a containment force on the French left.  The fight was on.
Prussians block French advance on the left
On the right the French cavalry raced towards the hill but the Prussians got there first.  Meanwhile the French infantry on the right followed up slowly.
View from French right - cavalry nearly at the hill.
Forcing some of the Prussian infantry into square, the cuirassiers were repulsed by close range fire as they crested the hill.  The looming presence of some Prussian dragoons didn't help.
Cuirassiers thankful they have backplates as well
Meanwhile on the French left a prolonged firefight developed with the French proving to have the advantage (eventually).
Prussian infantry running away (for a bit anyway)
However, this was of no help on the right, where the retreating cuirassiers were charged in the rear by the Prussian dragoons and routed.
Prussian dragoons crash into repulsed Cuirassiers
Unhelpfully, the other squadron of Prussian dragoons charged the French dragoons and they too wavered and fled.  The French infantry having just made it across the ford had no option but to form square and await their fate.
Dragoons rout, infantry in square, what else could go wrong?
Meanwhile on the left the Prussians were finding their resolve again, and although chased by a regiment of light infantry, the Prussians reformed, supported by troops from the centre.
For the French left, the tide is about to turn.
With the French right wing either routing or pinned in square the French left was not strong enough to take the hill, or indeed move out of the village, and started to waver and then crumble.  And there it ended after eight moves.
Endgame
Overall, this was quite disappointing performance by the French.  The 'unfortunate oversight' proved to be nothing of the sort as the Allies could quickly move to block the French advance on the right, whilst containing the smaller force on the left.  Perhaps next time I shouldn't split the French forces but then there would be even less to detain the enemy from rushing over to the ford to stop the advance.
It's hip to be square.
It may have worked if the crossing points were further apart or the Allies moved slower, or were inhibited in some way (such as by dice-enforced incompetence) but that was not how it turned out.

In case you were wondering, the figures consisted of Airfix and Esci 20mm plastics (it's not often you see Airfix plastic Highland light infantry on the table), and for historical reasons (and because the plastics aren't finished yet) the French cavalry and generals were represented by some (very) old "25mm" Hinchliffe figures, painted sometime last century.

The rules were WRG 1685-1845, which are still simple and elegant.  I don't know why people complain about the move sequence because we've never had trouble with it.  The only thing I noticed however, was the command and control aspect of it, as I'd forgotten how older rule-sets such as these often allow units to shoot off all over the place, without the requirement to maintain battle lines and higher level cohesion.  Nevertheless, they are still a serviceable set of rules which we will continue to use until we find something better.
Handmade buildings
Finally, the terrain was all scratch built, including the buildings.  You can't tell but the cottage on the right started off as a box that a Hornby goods wagon came in (it's not in there now) and the stones on the chimney were all lovingly hand carved by Geoff from a piece of plywood.