Showing posts with label WRG 1685-1845. Show all posts

Saturday, 16 May 2026

Chasseurs à Pied

In addition to the ongoing development of my early Napoleonic Russian and matching Württemberg armies in 15mm, I also have quite a few plastic 20mm French, mainly for historical reasons. However, some of these saw action in the first game of our One-Hour Wargames mini-campaign.

HäT Industrie - Guard Chasseurs à Pied

Nevetheless, one thing I didn't have was any guard units (apart from some Italeri Guard artillery).  That said, I do still have the contents of a box of old Airfix Grenadiers of the Imperial Guard but, although they are nice sculpts, they are quite small compared to the other units I have which are mainly Italieri now (although with some legacy Airfix units still knocking about) and not worth painting.  I also like to have units in marching poses if I can, so these HäT Industrie (8170) Guard Chasseurs à Pied were ideal.

More of same

There are (I think) three marching-ish poses in the box and enough to make a unit of 15+1 men, when based for the WRG 1685-1845 rules (60mm wide bases).  However, for some reason an officer is not included in the box, so the chap in the front rank brandishing a sword is a converted Italeri Guard foot atilleryman promoted from the ranks to regimental commander.

Overall, they are nice sculpts and are similar in size my Italeri line units.  They also match in style and quality my average painting abilities (but slightly better basing skills).

Saturday, 9 May 2026

One-Hour Wargames 19: Blow From the Rear

Quite some time ago we started (and eventually finished) a five-game mini-campaign based on the scenarios presented in Neil Thomas' useful book One-Hour Wargames.  The campaign premise is set out here, but basically the idea was to create a sequence of more or less logically linked games drawing from a branching set of possible scenarios.

Württemberg Chasseurs à Cheval - 15mm figures by Warrior Miniatures
Württemberg Jäger zu Pferd Herzog-Louis (Warrior Miniatures, 15mm)

The campaign was supposed to be a Napoleonic one, but other periods did creep in.  The four scenarios leading up to this one played (in sequence) were: 
As I had lost Scenario 07, Geoff got to choose the last game (Scenario 19) and elected to be Red, possibly because, quoting the book's description of the situation, this is what Blue (me) would have to deal with: "The Blue general is defending two river crossings from what he thinks is a numerically inferior Red force.  His complacency will be shattered when an additional Red contingent arrives in the Blue rear area."  Shattered you say?  We'll see about that...
 
Hand drawn map of OHW Scenrio 19
OHW 19 : Deployment and Manoeuvres
 
The scenario required that the Blue army (my 15mm Württembergers, all by Warrior Miniatures) start with two units confined to the road in the south-east corner of the table until Move 7, with four units to be deployed within 6 inches of the river.  Red (Geoff's Austrians) would commence with no units on the table initially, but with three starting on the north side of the map on Move 1 and then three more units appearing from the west on Blue's side of the river at Move 6.
Initial deployment with Austrians moving towards the bridge
Initial deployment

You'll note from the map that we actually started with seven units each so that we could have some light infantry and artillery, and also that I had forgotten how to spell Württemberg.  The rules we used were WRG 1685-1845, still going strong after all these years.  Anyway, the game opened with the Austrians marching rapidly to contest the bridge. 
 
Wargames table with Austrians advancing
The Austrians advance to the bridge

Meanwhile a regiment of Austrian infantry crossed the ford to the left of my position, intending to bolster the units that would inevitably 'surprise' me as they appeared from the west.
 
Austrians ford the river
 
Full of enthusiasm, the Austrians charged across the bridge crashing into the Württemberg 1st Line Regiment (with the yellow flag), as the other Württemberg regiments prepared to step in and support. 
 
Austrians charge across the bridge

The Austrian charge managed to push back the 1st Line Regiment but it was not broken.  Meanwhile, the Austrian flanking force had rapidly arrived, supported by the infantry that had crossed the ford.
 
The Austrian flank attacked develops

The Austrians continued to push forward aggressively, probably hoping to shatter the Württembergers, as their infantry charged across the bridge into the halted 1st Line Regiment whilst the Austrian cavalry crashed into my artillery and my Jäger zu Pferd (mounted jägers).

The Austrians attack on all fronts
Mixed results for the Austrians however.  In the centre, the Austrian heavy cavalry easily swept away my artillery and pursued them off the table to the east.  However, the combined firepower from the Württemberg 1st and 4th Line Regiments completely destroyed the Austrian infantry that had managed to cross the bridge, leaving an Austrian general isolated on my side of the river.  Meanwhile the fighting continued between the Jäger zu Pferd and the other Austrian heavy cavalry unit.

Mixed results

Unfortunately for the Austrian cavalry still on the table, they were forced to flee after being bested by the Jäger zu Pferd, aided by some nifty flanking fire from approaching light infantry (Jäger zu Fuß).

Austrian cavalry flee beyond the blue zone

It turned out that things were not going well for the Austrians, with all of their cavalry off the table (or about to be) and having lost a regiment of infantry already.  However, the Austrian infantry that had crossed at the ford was still active and needed to be dealt with.  So, having driven off the Austrian artillery on the other side of the river, the Württemberg 5th Line Regiment (Blue flag) turned to face this threat. 

Württemberers realign to the flank

Despite the 5th Line Regiment taking casualties, the Austrian infantry were being effectively boxed in by the Jägers, with nowhere to go, except to their rear, which is where the Jäger zu Pferd had ended up, having pursued the Austrian cavalry off to the west.  Meanwhile, the other Austrian cavalry that had followed my artillery off the table earlier had reappeared, but were about to be fired on by two regiments of infantry. 

Endgame (nearly)

At this point the Austrians conceded the game, realising that they were outnumbered on all fronts and that they could not achieve the victory condition of ensuring no Württemberg units remained within 6 inches of the river by the end of round 15.

Overall, this was quite an interesting encounter which probably could have gone either way.  The Austrians were aggressive and tried to coordinate their assaults but were unlucky and often flanked, which weakened their attacks.


Thursday, 13 February 2020

One-Hour Wargames 14: Static Defence

We are currently running a simple campaign comprising linked scenarios from Neil Thomas' book One-Hour Wargames.  The outline of the campaign is described here, with the idea that whoever won the first game would get to choose the next scenario from a limited but branching list.  As recounted here, I won the first encounter, a 20mm Napoleonic French versus Prussians affair, which meant I got to select the second game we would play.
The scenario I chose was No. 14 Static Defence, where the defender was required to occupy two objectives (a hill and a built up area (BUA)), whereas the attacker only needed to hold one of them by the end of the game (15 turns).  Furthermore, to add to the defender's woes he would at all times have to keep at least two units within 12 inches of the hill and two units within 12 inches of the BUA.

For this game we stayed in the Napoleonic period but I was able to field my new, 15mm Warrior/Roundway Russian army for the first time.  My opponents would be French with some Bavarian allies and the rules used were our trusty WRG 1685-1845.  Order of battle was as follows:

Russian (6 units)
1 x Murmansk Musketeers (Lithuania Inspection)
1 x Rostov Musketeers (Lithuania Inspection)
1 x Tomsk Musketeers (Siberia Inspection)
1 x Ekaterinoslav Grenadiers (Lithuania Inspection)
1 x Emperor's Cuirassiers
1 x 6th Jägers

French/Bavarian (6 units)
2 x French Line
1 x Old Guard
1 x Bavarian Line
1 x French Cuirassiers
1 x French Foot Artillery
 
The scenario puts the defender in the difficult position of having to defend two objectives but not knowing which one the attacker will go for.  The obvious objective would be the BUA, because it is closer to the attacker, but that's not how I decided to play it.  The map below shows the terrain and also what happened...
My plan was to attack the hill at the defender's side of the board, bypassing the BUA altogether.  I would advance directly to and assult the hill using my cuirassiers as a screen, whilst my jägers would invest the central wood to harass the enemy from there, thus securing my flank.
The French plan was to defend the BUA in strength (with the Old Guard and the artillery in attendance) and use the cuirassers as a mobile defence in the centre.
My plan went well.  As my infantry advanced in column up the left towards the hill, my curassiers surged forward to engage their French counterparts, whilst my jägers marched into the central wood.
The cavalry quickly engaged and the French found that they were no match for my newly painted Russians.
Meanwhile, the French, realising that the BUA had been completely bypassed, desperately started to move the defending troops out and towards the other side of the table, forgetting (perhaps) the requirement to stay within 12 inches of that objective.
In the centre things were going very badly for the French cavalry.  Being forced to flee they were pursued (and eventually caught) by the Russian cuirassiers (note hastily redeploying French artillery about to be trampled).
As for the Russian infantry, they stoically (and inexorably) continued their advance towards the hill changing into line formation for the assault.  The two defending French infantry regiments looked on, nervously.
And so to the attack.  As the Russians got closer, the French fired and forced the Tomsk regiment on the right of my line to halt.
But the regiments of the Lithuania Inspection continued forward, returning fire, when something rather unfortunate (for the French) happened:
This resulted in the French regiment on the left being all but blown away and its tattered remains turned around and fled.  The Ekaterinslav Grenadiers then moved forward putting foot on the hill, menacing the remaining French infantry.
Meanwhile, the Bavarians and Old Guard were moving towards their collapsing right flank (the Russian cuirassiers having chased the French cavalry off the table in the background), but we all knew it would be too late.
And so it proved, as a full volley from the Tomsk Musketeers punched holes in the last French regiment on the hill and the grenadiers moved in for the kill.  It was all over.
So, a resounding victory for my new Russians and a great start to their career.  I would take credit for the win, but perhaps their general deserves most of the glory.
And with two wins under my belt, my thoughts turned to the next game in the campaign.  According to the system I'd set up the choice was between No. 13 Escape and No. 18 Counter-Attack.

I swithered a bit between the two, but considered that as I'd won two games in a row I ought to make the next one more of challenge for me, so I decided on No. 13 and that will be the next AAR in this series.

Sunday, 14 July 2019

One-Hour Wargames 16: Advance Guard

This is the after action report (AAR) for the first game in the One-Hour Wargames Campaign that we started recently.  The idea was to begin with a neutral 'encounter' sort of scenario and see how it went from there.  For this game my freshly painted 20mm Napoleonic French (Italeri mainly) would be up against Geoff's Prussians.
The scenario allowed both sides to have six units and the objective was to be in uncontested possession of the central village after 15 moves.  For this game we used the One-Hour Wargames horse and musket rules, slightly amended. The book suggests that orders of battle be decided randomly.  Consequently starting forces looked like this:

French
3 x line infantry
1 x light infantry
2 x cavalry (dragoons)

Prussians
3 x line infantry
1 x cavalry (dragoons)
2 x artillery

As you can see from this, the French started with more infantry (including light infantry) and more cavalry than the Prussians, who were lumbered with two artillery batteries.  As we shall see, the lack of mobility, in what was suppposed to be an encounter battle, with both armies marching on to the table, doomed the Prussians from the start.
Scenario 16: Advance Guard
My plan was very simple: to advance my line infantry rapidly to the objective, using the cavalry to sweep round the open left flank (see map).  One of my infantry units would meanwhile hold the gap between the village and the wood to cover my light infantry into the wood on the right flank.  The plan worked perfectly.
French troops rushing the village
Cavalry to the left of me, infantry to the right
In fact the Prussians had barely got going before the French were already in the village and were beginning to threaten both flanks.
Prussians caught flat-footed
On the left, one unit of French dragoons immediately engaged the Prussian cavalry in hand to hand combat, whilst the other sneaked round the back of the melee to threaten the advancing infantry, forcing it into square.  In the centre the Prussian infantry stopped to fire at my troops in the village whilst another French infantry unit moved up on the left of the village.
Meanwhile, on the right my light infantry had advanced (very) rapidly and had managed to get into the woods without being intercepted.  Again the Prussian infantry had lined up opposite the French and started to engage in a fire fight.
From this point on things deteriorated very rapidly for the Prussians.  On the left after a few rounds of back and forth, the Prussians dragoons were defeated and the French dragoons then moved against the flank of the infantry facing the village.  Meanwhile the other dragoon unit had crossed the front and/or side of the square and charged the Prussian guns before they could bear, whilst the French light infantry in the woods had extended into line to engage the other Prussian battery from cover.
Not looking good for the Prussians frankly
The last blow of the game came when the French dragoons crashed into the flank of the Prussian infantry.  And there was nothing he could do about it.
Contact!
Neil Thomas' rules for horse and musked are quite brutal (to say the least) and the Prussians were swept away in one go.  And with the very real prospect of the adjacent Prussian line about to suffer the same fate, with the Prussians having basically no chance of getting into the village let alone taking control of it, that was the end of the game.
Endgame
Overall, the game was a frustrating one for the Prussians.  They were only able to deploy slowly because they had two artillery units and were deficient in cavalry.  The fact that the French got to move first, combined with the rapid movement rates, long shooting ranges and brutal outcomes from any sort of reverse, which define the OHW rules, meant that right from the start the Prussians were always going to have an uphill struggle to win.

On the other hand, it was an emphatic victory for the French and even more enjoyable because for most of my troops this was their first battle.  Perhaps it is true that the better the paint job the more likely one is to win, if I may say so myself (this thesis may require more research).

Anyway, with a win for the French the honour falls to me to choose the next battle and I have decided this will be #14: Static Defence, which will feature in the next campaign AAR.

Saturday, 29 December 2018

Hurrah and Hussar!

Just to prove I'm still capable of painting figures as well as making buildings, here are a few squadrons of French Napoleonic hussars I completed this month.
1st Hussars
These are Italeri French Hussars (#6008), which are very nice figures and easily match the dragoons I painted recently.  The figures come in a variety of uniform combinations, with some sporting campaign overalls, with or without pelisse worn or slung.
2nd Hussars
I decided to make six bases and paint each pair as a different regiment.  So, to get a variety of uniforms I settled on painting the 1st, 2nd and 6th regiments.  The box comes with 17 figures, so to make up the last squadron I had to add a figure from somewhere else to get to a round 18 figures and therefore six bases of three.
6th Hussars
The extra figure is wearing a busby, thus masquerading as an elite company trooper, and is actually the officer from the Italeri Guard Horse Artillery set (#6018), the rest of which may feature in a future post.

With these hussars, I'm nearly done with 20mm French Napoleonic cavalry, although I did get a box of Italeri French Light Cavalry #6080 (i.e. Chasseurs a Cheval) a few months ago, which as a cavalry type were more numerous and more commonly deployed than hussars.  So I may get around to painting them next year, once I've got a few other projects out of the way first.

Wednesday, 4 April 2018

French Generals

I've not posted for quite a while but that doesn't necessarily mean I've been idle on the wargames front.  Although I have.  A bit.  Anyway, here are some figures I completed recently.

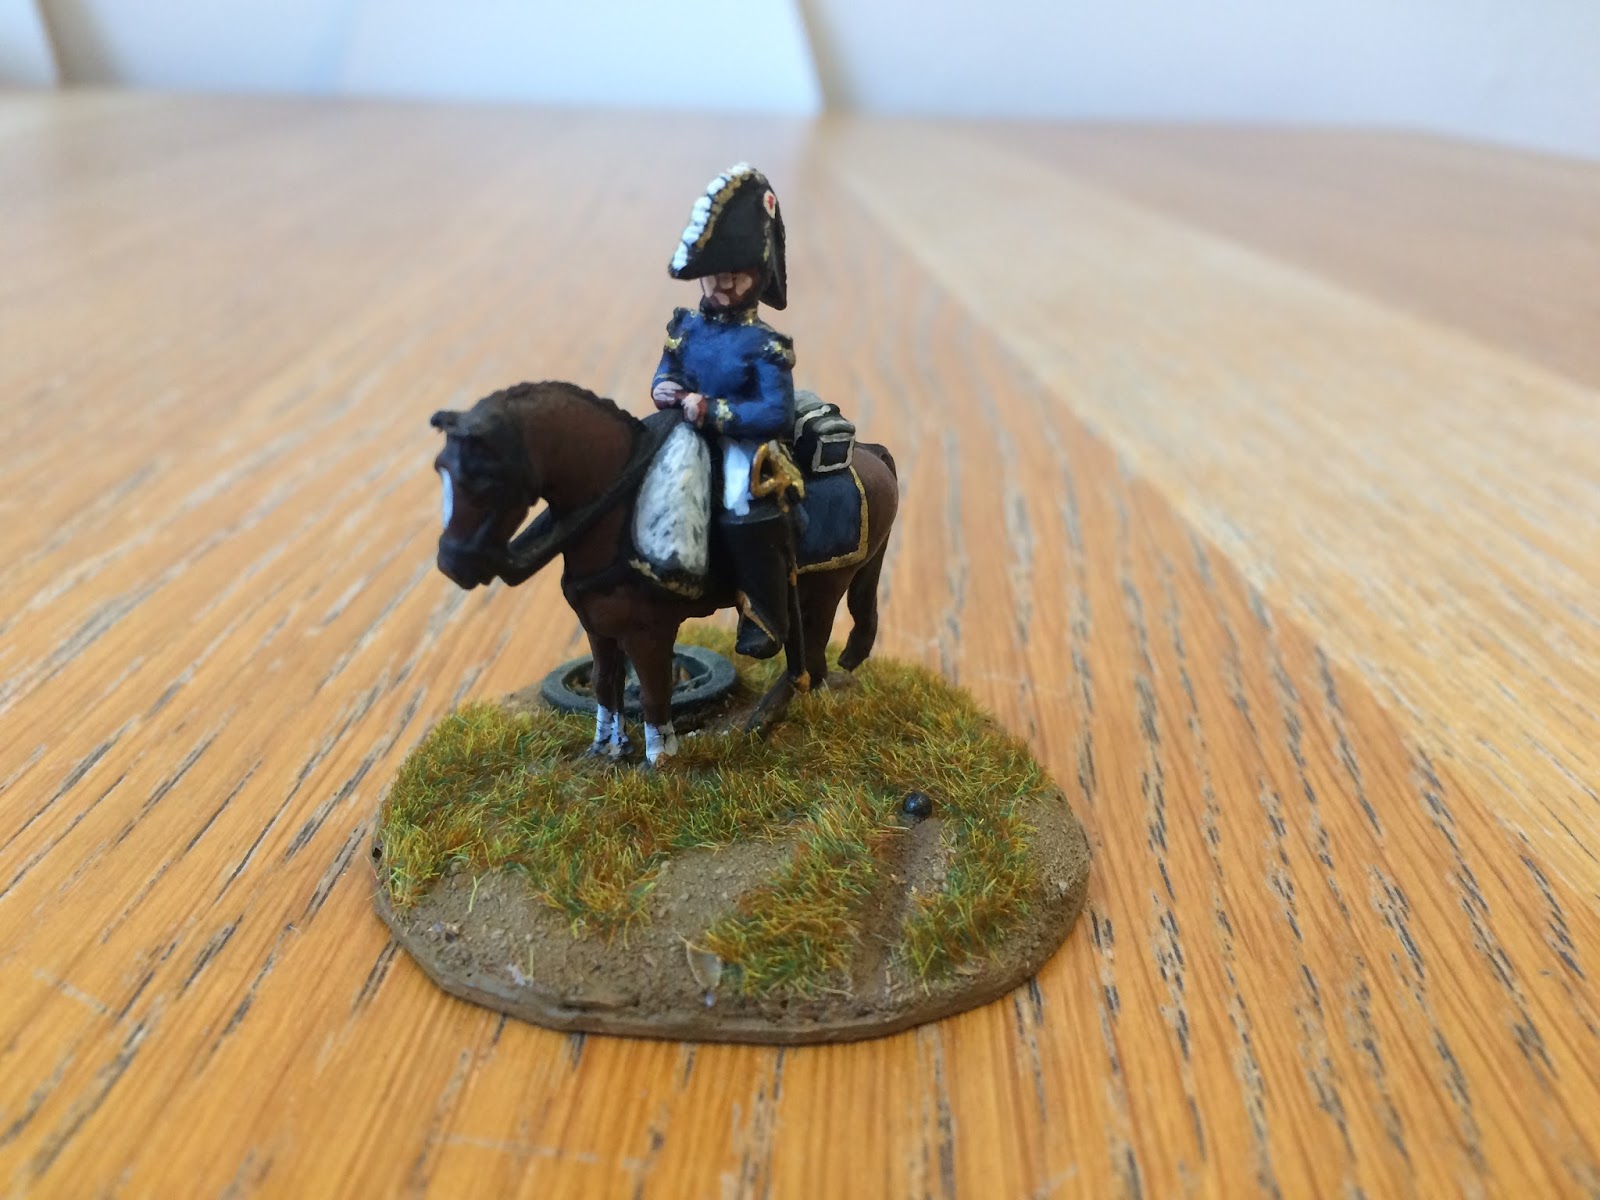
They are three 20mm Minifigs French generals that I must have bought some time in the 1980s and which have been lying around undercoated for decades.  So, as I've been painting 20mm French Napoleonics recently I thought I'd get these finished too.
Acceptable casualties.
Having improved my horse painting (in my opinion) over the past few years with my efforts on dragoons and cuirassiers, etc., the horses were straightforward.  However, for these guys I wanted to have them on round bases (not WRG 1685-1845 standard general bases, note) with something else going on to distract from what are fairly dull figures (apart from the paint job obviously).

For the first one shown I finally managed to work in a casualty figure from my first ever box of Airfix Napoleonic French (c. 1976), just lying there whilst the general rides by nonchalantly.

The next one is probably the dullest figure in terms of pose (ignore the hat), so I painted him as per the illustration on the dust cover of my trusty 1977 reprint of Jack Cassin-Scott's Uniforms of the Napoleonic Wars in Colour 1796-1814, which apparently was Marshall Bessieres' getup.
You want it in green and red?  Why, anything you say colonel.
For this one I decorated the base with some gravel and behind the figure is a tree-stump made from a clove I found in a takeaway curry (I've got a few of those drying in my bits box now).
Note clove pretending to be a tree-stump.
It was a bit bendy even after drying so it has had a good few coats of paint to stiffen it up.  Also, I had thought to add some foliage to it but then considered that maybe there would be just too much green on this one.  It's amazing how much you can write about something you found in a curry.

The last figure is more soberly attired and sitting calmly on his horse beside a wheel from a (1970s) Airfix cannon (the one that came off the cannon on a dragoon base in fact).
Three wheels on my waggon... no wait, here it is.
However, displaying remarkable sangfroid the general is ignoring something else going on on the other side of the base, which is slightly more alarming.
Well pick it up and chuck it back then.
As you can see, a large cannonball has furrowed the ground just next to his horse.   This was made using one of those round headed pins you used to get with new shirts.  I cut most of the pin off leaving about 5mm so I could secure it into the base.  A spot of black paint and some light dry-brushing with steel finished the job.

Wednesday, 5 October 2016

Jägermeister

I've still got the painting bug and am currently working on my 20mm French Napoleonic collection (see earlier posts this year).  Having completed various infantry units and some excellent Italeri dragoons, I thought I should really paint those Esci cuirassiers that have been under the bed since about 1990.  In fact I'd been in two minds about painting them at all because the figures aren't as good as the dragoons by a long chalk and I was thinking maybe I should just get some Italeri carabiniers instead.
Deliberating on all this I was of course distracted along the way and impulse-bought and painted some HäT Industrie Württemberg cavalry (Jägers) in the two weeks it took me to decide what to do.  These were the first HäT figures I'd painted and I found them quite nice with a lot of well defined detail.  The plastic, although a bit flexible, takes the paint very well.
There are only four poses (12 figures altogether) on three identical sprues in the box (and only two types of horse), but one man on each sprue comes with a choice of arms that you have to glue on.  I made one of them a trumpeter in the vivid yellow coat.  I think the troopers look quite good in their black gauntlets, dark green tunics and yellow trim.
Based up for the WRG 1685-1845 rules on 60mm x 40mm bases, with my usual concoction of coarse sand, painted dark earth then dry brushed in a sandy colour and then flocked, I consider that they've turned out very well.  And I think I'm really getting the hang of painting horses now after my initial hesitations. 
Oh, and finally, here are the cuirassiers. I had two ancient packets of them stashed away and was able to make quite a few bases although whether they'll all get an outing at the same time remains to be seen.

So that's it then, apart from six bases of Italeri French hussars to finish and perhaps one or two more Italeri line infantry regiments (possibly to be painted as Saxons or Swiss, just for a change).

However, I'd really like to get some HäT Württemberg infantry now, as well as the HäT French Guard Chasseurs a Pied, but neither seem to be available in the UK at present.  Still, I could always acquire and paint up some carabiniers in the meantime...