Saturday, 28 March 2015

Campaigns and Earthworks

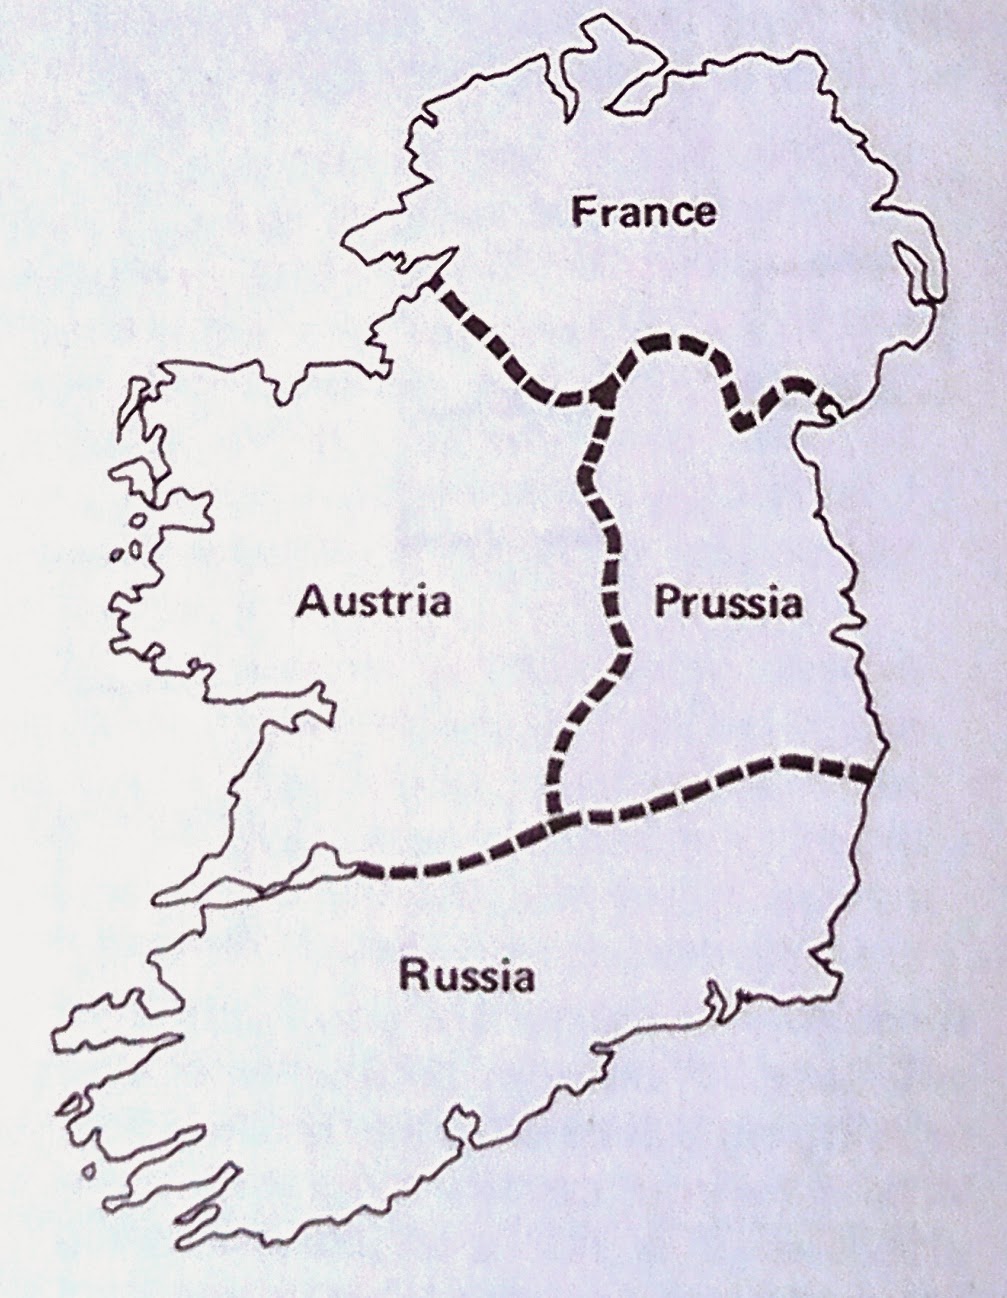
Wargame campaigns are funny things and we've tried a few over the years (and more are planned).  One of the first large scale campaigns we did used a somewhat truncated map of Ireland, over which we fought a bloody ACW campaign.
"Say cheese"
We decided to use Ireland as the basis for the map because a) Bruce Quarrie had suggested it in the Airfix Magazine Guide No. 4 "Napoleonic Wargaming" and b) we happened to have a map of Ireland.
Campaign Map from Airfix Magazine Guide No. 4
Not having access to a Xerox machine (this is quite some time ago) our map was made by (Geoff) tracing the master map and adapting it somewhat.
Hand drawn map of Ireland, somewhat adapted
Map movement was conducted using the classic matchbox chest of drawers method and battles were fought using the old Circa 1863 rules, which produced a gruelling, yet I think accurate, outcome.  Anyway, what has this got to do with earthworks?
Cautious Confederate attack on Federal positions
Well, one of the battles involved an attack by superior Confederate forces on a Union held village (Ballina).  It was judged that the Federals would have had time to throw up some defences and therefore it was necessary for me to make some earthworks.

Since then, these have lain in a box (only getting the occasional outing) but it was always my intention to fill in a few gaps and refurbish what I had already made, so this is what I did last week.
Stage 1: glue polystyrene to cardboard
Raw materials comprised strips of polystyrene pizza packaging (i.e poor man's foamboard), cardboard, matches, polyfiller, fine sand and PVA glue.  The polystyrene (suitably scored to allow it to key) was used to create the overall profile and then this was covered in filler.
Stage 2: profile with filler and attach matches
Once all this had dried out thoroughly I spread PVA glue thinly over the front slopes and added fine sand to give it some texture as the filler I had was too smooth (it was what I had to hand at the time). 
Stage 3: sit back, take out your pipe, and admire your handiwork
Everything was then undercoated in matt black and the earth slopes painted in a reddish brown colour (I used Tamiya XF-79 Linoleum Deck Brown) in order to match the pieces I already had.  The woodwork was painted with Revell Acrylic Dark Earth (82) and everything was dry-brushed with a sand colour.  And here they are lined up on the kitchen table with some Airfix soldiers manning them, veterans from the original battle.
A selection of what's in the box now
I was particularly pleased with the gun emplacements which featured in the battle mentioned above.
Suspiciously empty gun emplacement
You will notice that the emplacement I've shown is empty.  This is because, although the Federals had had time to prepare defences, they did not happen to have any artillery.

This was not known to the Rebels who approached very cautiously, only to find that the guns pointing at them, apparently fiendishly waiting until they got to cannister range, were merely tree trunks shaped and painted to look like guns.  Quaker guns.  Well, I laughed: but then I did say that campaigns could be funny things.

Tuesday, 24 March 2015

Roman Gaming Aids

I was just browsing the internet (and twitter) today and came across this interesting Roman gaming aid, which although it looks like a novelty cheese grater, is actually the Vettweiss-Froitzheim Dice Tower.

Allegedly also found was an extendable steel ruler and a blood-stained copy of WRG 6th Edition
It was uncovered in 1985 at the site of a Roman villa in North-Rhine Westphalia and dates from the fourth century AD.

The inscription translates as "The Picts are defeated. The enemy is destroyed. Play in safety!"  Clearly the person who owned this had spent time north of Hadrian's Wall.  But how could they know that the Picts would prove ultimately as indomitable as the Gauls...

Saturday, 21 March 2015

After the 100 Days: Longwood

The title of this post points in a couple of directions simultaneously.  Firstly, I realised that my previous post, concerning a brief AAR from a Napoleonic encounter, was actually my hundredth post, which by any reckoning is a milestone from when I started this blog almost exactly four years ago.  Secondly, I happened to be on the remote island of St Helena at the time I started the blog, and therefore there is a connection to Napoleon and his final 100 Days, this being the bicentenary of Waterloo and all that.
There is a lot of very interesting military (and other) history relating to the island, discussed here and here and possibly here, but as the photos have been burning a hole in my hard drive for four years I thought I'd post a few here of our visit to the final residence of Napoleon Bonaparte, at Longwood.
View from Diana's Peak looking NE towards Longwood, Flagstaff Hill and The Barn
The first thing is context and setting.  St Helena is approximately 10 miles by 12 miles across and is located in the South Atlantic, some 1,370 miles SSW of Luanda on the Angolan coast.  There is no airport (one is being built currently on Prosperous Bay Plain, not far from Longwood), so when we went there in 2011 your choice was three days from Ascension or six days from Cape Town (only 1,950 miles as the albatross flies), by boat.  We did both legs of the RMS St Helena's voyages.  Anyway, the above photo shows where Longwood is, hidden in the dark green ridge in the centre of the photo.  Flagstaff is the pointy green hill and The Barn is the one that looks like a barn.
Longwood House
Longwood itself is very small and is certainly not a palace.  In fact it was a farm before Napoleon was placed there - he never liked it and I can understand why.  It seemed damp and claustrophobic even when we were here.  For some reason I didn't take any pictures in his main living area - I think it was because it was so small, dark and depressing and there were too many other visitors there.
Napoleon's deathmask
The main features I noted were the deep copper bath he apparently spent a lot of time in and his bed, the one he died in.  The dining room seemed to have a bit more life to it but it was not particularly big.
Napoleon's dining table and chairs
The walls had few pictures of note - mainly portraits of Napoleon and some of his Marshals, including this one of Murat, looking a bit pleased with himself.  Perhaps because he wasn't trapped on St Helena.
Murat
Napoleon was clearly pretty miserable there and it is perhaps surprising that he lasted as long as seven years before he died in 1822.  I did scrutinise the wallpaper closely for signs of arsenic but they told me that, although it was the same pattern, none of the original stuff remained...
Flagstaff with flagstaff
Once the airport is built I am sure that Longwood will become far more of a tourist attraction than it is at present.  The Saints sort of try to make something of it when the cruise ships come in (they don't try that hard), although sometimes you have to be pretty observant to spot things, like this mannequin of Napoleon on the balcony of the Consulate Hotel in Jamestown.
Napoleon at the Consulate.  The bar is downstairs.  We referred to it as the Disconsolate.
He's actually looking across the road at the house that Sir Arthur Wellesley once stayed in on his way to India before he was famous, now called Wellington House.
Wellington House.  Since repainted, but still blue.
This picture of Wellington House was taken from our apartment which was across the road, and which happened to be on the site of the first house that Napoleon stayed in when he arrived on the island.  Anyway, enough of this, back to wargaming.

Sunday, 15 March 2015

One-Hour Wargames 11: Surprise Attack

Following on from the successful and (more or less) decisive game we had last month, we thought we'd kill two birds with one stone by trying out another of Neil Thomas' scenarios from his book One-Hour Wargames, but again not actually using his rules...
Austrian Line (Roundway Miniatures 15mm)
Scenario 11 'Surprise Attack' is supposed to represent Quatre Bras where Ney encountered the Anglo-Dutch army two days before Waterloo at the strategically important crossroads.  The original 3' x 3' layout described in the book has a lake where we put the (impassable) hill instead, which was substituted as we didn't have a piece of lake scenery to put there.  
Initial dispositions - Austrians in white, French in blue.
However, stung by my comments on our last battle, Geoff had conjured up a bit of road from a strip of painted lino, which did the job perfectly, at least for one of the roads (the crossroad being defined by buildings with the lateral roads depicted by hedges).  You can see I've been experimenting with MappingBoard to try to produce some better maps.
Initial positions viewed from Austrian right
The scenario required that a third of the defending forces (the Austrians) be deployed in the centre of the table, with the remaining two thirds coming on in two waves subsequently; the objective being to deny the French control of the crossroads.  The French could bring on all their forces at once, but had to deploy from the road.  As noted we were not using the Horse and Musket rules included in Neil Thomas' book but instead were play-testing Field of Battle 2 for the first time, which we started with high hopes and the excitment of the novelty of the 'sequence cards', the like of which we had never used before...
Austrian infantry brigade and grand battery (Roundway & Warrior 15mm)
Anyway, the Austrians (me) elected to start with an infantry brigade and an artillery brigade on the table blocking the road between the wood and the hill.  The French (Geoff) started the game with a cavalry brigade and the lead elements of an infantry brigade.
French advance (Hinchliffe & Naismith Curassiers; Naismith Dragoons)
Sadly, as is often the way when we are pressed for time and are trying new rules, things did not go according to plan.  At all.  The first thing was that because of the system of rolling for initiative and then turning sequence cards to enable various activities (any activities), it took an inordinately long time for anything to actually happen.  Not to mention the oddly frequent occurrence of 'Lull' cards.
Austrian Brigade (Warrior figs in the centre, flanked by Roundway minatures)
This, coupled with our unfamiliarity with the rules (not improved it has to be said by my having read through them at least three times beforehand in the preceding weeks and still being none the wiser) meant that we really didn't get very far before we had to pack up for the night.
The Austrian grand battery produces smoke, but very little fire
The first activity permitted was that the Austrian grand battery could fire at the (Hinchfliffe) curassiers lined up in front of it, but through (I think) using the incorrect factors and making numerous abysmal die throws this had very little effect on them (we realised later they could well have been blown away).  The curassiers having got off lightly, and after a bit more hanging around, eventually (after a few rounds of initiative, lulls and waiting for a Movement card) they closed to contact whilst the battery was not able to fire again.  Hmmm.
Curassiers try to contact Austrian infantry
Meanwhile, the other regiment of curassiers attacked the infantry regiment closest to the artillery but was caught by close-range opportunity fire (as they had been out of range earlier) which pushed them back.

However, having contacted the artillery in one go it was proving difficult for us to work out how to resolve the melee.  Basically FOB2 has rules and examples on what to do if more than one unit attacks a single unit, but not what to do if one unit attacks multiple units simultaneously (i.e. the artillery units making up the grand battery, which had different combat dice).  And that is where we got stuck.
Curassiers try to charge home (reverse view)
This actually, gets to the nub of our issues with the rules - the dispersed and semi-sequential way in which they have been written.  I write and review a lot of academic and technical reports in my professional life and one thing I can pick up on very quickly is where it seems that the writer is so close to the content that he or she seems unable to imagine what it is like not to have the knowledge and presuppositions that they have, i.e. to be able to step back completely from the detail and assumptions and lead someone through it who is not familiar with whatever the report (or rule set) is about.
Austrian line repulse the curassiers back to the starting line, apparently
And this is what we have in these rules (as is often the case with wargame rules, it has to be said): the writer is clearly so close to them that unless you have played earlier versions and/or have an experienced player to explain them to you, then you are not going to have much hope in working out what to do, particularly when it is late on a Friday night, you've had one too many herbal teas and the clock is ticking.

I'll give another example of the perplexities of these rules: firing.  Everthing in FOB2 is driven by sequence cards and, for example, to be able to fire (at least after the first time) you need to be able to play an Infantry or Artillery Firepower card.   Why therefore are the firing rules not all in one place where the Firepower card is described, instead of dispersed in various locations within the rules?

Another issue I struggled with was the very basic concept of moving, i.e. if you draw a Movement card does that mean all your units can move or only one?  The rules are not explicit.
Austrians: Hungarian regiment (15mm Warrior Miniatures)
I know a lot of people don't like WRG rules because of their prescriptive and sometimes didactic delivery (step forward DBM and DBR) but at least everything is laid out logically and sequentially and you don't have to go hunting back and forward through the rule books to piece together what one does in order to fire some muskets.  Perhaps I am old school (wait, what? I am old school), but I do like things being laid out as clearly and simply as possible, preferably matching the actual sequence of play and in locations that you are likely to need that information all in one place.

Anyway, rant over.  To this end, for the next Napoleonic game we are going back to basics (not as far back as Bruce Quarrie though) and will be using WRG's 1685-1845 rules.  Some people seem to have problems with the cleverly meshed turn sequence they use but I seem to remember never having any issues with that at all.  And if these don't turn out well, there are a lot of other rules to choose from, Napoleonic POW2, and the free Fast Play Grand Armee and Pro Patria being a few that spring to mind...

Saturday, 28 February 2015

WSS Danish - Regiment Livgarde til Fods

I've caught the painting bug again and managed to finish the second of my War of the Spanish Succession (WSS) Danish regiments this week.  This is the Livgarde til Fods regiment with their distinctive straw-yellow coats and carmine facings and breeches.
Figures are from Blue Moon (15mm/18mm) and my painting guide was a combination of CS Grant's books (The Armies and Uniforms of Marlborough's Wars Vols I & II) and the booklet by CA Sapherson (the Danish Army 1699-1715), both from Caliver.  I like these figures in the march attack pose, particularly as there are about three variants of each type.
My plan is to paint the six Danish infantry regiments present at Blenheim, comprising Scholten's command and I have started with Bielke's Brigade, completing the Regiment Prince George previously (which now has flags, incidentally).
For the guard regiment I tried to make the shading a bit more pronounced than my first effort with Prince George and, after undercoating in black, I used ochre as the coat shade colour and brick red for the facings and breeches.  These were then completed in yellow (Revell acrylic 15) and Carmine (Revell acrylic 36) leaving plenty of the shade layer showing through.  I think that the coats are meant to have red lace up the front but I tried that and it didn't look right so I just stuck with the simple yellow coats and red cuffs.  I'm quite pleased with the results overall.
Flags came from this site which I just printed out and glued on.  The Blue Moon standard bearers have cast flag poles and I did consider drilling them out and replacing with brass rod, but with the flags glued on they seem a bit more robust so we shall see how that goes.  Anyway, next up is Prince Carl's regiment which is back to the basic Danish light grey coat with yellow facings, which I hope to finish in the next few weeks.  We shall see...

Thursday, 12 February 2015

Boxes

One of the things I like most about this hobby is making and painting things, particularly if you use scrap to do it.  To this day, when I see an empty cereal packet or some polystyrene in a skip, my first thought is always "what can I make out of that?" 
"Digestive biscuits, Sir!  Faahsands of 'em."
So this is what I created this week: boxes (plus a few rolled up carpets).  All very simple really.  The wooden crates are just balsa offcuts bound with thin card, and the ones with the tarpaulins over them are the really scraggy balsa offcuts and/or bits of polystyrene, with tissue paper glued over them.
"The party of the first part..."
The carpets started off as some pieces of T-shirt material, rolled up and tied off with thread, with some PVA glue to hold them together.  The idea was to make some more accessories for my 28mm Copplestone figures and here they are, on one of my scratch built cardboard and balsa river boats (note use of IKEA pencil for the funnel).
"Just keep schtumm Carruthers and the customs officers won't notice a thing."
I've been toying with running some skirmish games so these will come in handy for that.  We did play some Indian Mutiny skirmish games quite a long time ago and I still have some of the items that Geoff made at the time, including a welsh dresser and, my personal favourite, a war-weary billiard table.
This is what happens when you play billiards with a shotgun.
I did consider making an upright piano (or a pianolla?) this time round, but thought that might be taking it a bit far.  Maybe next week.

Saturday, 7 February 2015

The Other Armourfast Su85

Having completed one of the Su85s, I went and finished off the other.  I thought I'd go further with this one though and add a bit more clutter.
Working it out with a pencil
This included a barrel made from a bit cut off a pencil, with some strips of paper glued round it, and a roll of material made from a a piece of old T-shirt rolled up and tied off with thread.  There is also a piece of spare track on the front.  It's not quite right as T34/Su85 track section but it was the best I had to hand (made from some old Airfix Tiger tracks, cut down a bit).
This Su85 has been depicted a lot more beat up and muddy than than the first one I painted.  I also left the commander's hatch open, until I can find a figure to go in it.  I had wanted to leave the driver's hatch ajar too, but that would have been a bit more fiddly.
Not sure what's up next, although I expect that it will be these KV-1 babies.  Looking forward to these as they seem a bit more detailed and for the first time ever (after being brought up on Airfix and Matchbox tanks), gravity seems to to be having an effect on the tracks in a realistic manner.
After this, it seems I've run out of Soviet tanks to make, although the Pegasus early KV-1/KV-2 combo, plus their T34/85 and even their T26, are beckoning.

Thursday, 29 January 2015

Armourfast Su85

Following on from the Armourfast T34/76 models I made and painted earlier this year, here is the Su85 tank destroyer.  I'd actually painted another T34/76 this week as well, but you've seen one of those already.
It is rather a spiffing model with nice details such as separate handrails and four fuel tanks.  I put another one of my bespoke hawsers on this one.
Paint scheme was the usual Tamiya XF-13 J.A.Green with a black wash, followed by some light dry-brush highlighting with buff paint.  Decals came from ebay after I decided that my hand wasn't steady enough to paint the numbers.

I didn't make this one as weathered as my T34/76 as they are the 1941 versions so I reckoned that this one hadn't been in the field as long as they had.  I have another Su85 to make and paint (Armourfast kindly put two in a box) and then I can move on to the Pegasus KV-1, or perhaps another project...

Monday, 26 January 2015

One-Hour Wargames 8: Melee

It's been a while but finally I have a wargame to report.  I got a copy of Neil Thomas's "One-Hour Wargames" (published by Pen & Sword) last year and and we had talked about trying out the rules and scenarios it contains.
15mm Hinchcliffe French Curassiers
Basically, the book is meant to be the antidote to (allegedly) 'billiard-table game' rules like Black Powder.  It therefore a) contains very simple rules tailored for each historical period, b) assumes you will play on a table 3' by 3' and c) that you will generally field six units each.  To facilitate this it includes 30 scenarios and associated maps that are meant to be suitable for any period.
One-Hour Wargames Scenario 8: Melee
The one we went with was Scenario 8: Melee, which features a hill, some woods and a road (see my sketchmap).  And as we were trying to do this in an hour, we even dispensed with any fancy frippery, like a basecloth, so it was quickly laid out on the bare kitchen table as you can see.  That's the road marked out with ...er... bluetack: Geoff has made a lot of scenery over the years but doesn't seem to have gotten around to roads yet.
Cue rendition of Walton's "March Past of the Kitchen Utensils"
For this scenario the game objective is control of the hill.  Red force (in this case, the French) starts with two units on the hill facing south and reinforcements come on in groups of two thereafter at preordained intervals.  Blue force (in this case, the Austrians) has to capture the hill but can only bring its units on three at a time, again at move numbers defined by the scenario rules.
Austrians deploy
The French (me) started with a "brigade" of line (3 bases) with artillery and light infantry on the hill.  Sensing the importance of the woods in front of the hill the light infantry were moved from their position on the right, across the front of the line brigade, whilst the Austrians advanced dragoons to threaten the objective, as well as pushing grenze up to contest the woods.  Other Austrian troops continued quickly up the main road intent on outflanking the initial French position.
View from behind French lines
Meanwhile (and probably too quickly) the first French reinforcements started to arrive (curassiers and more line, in bicorns), which were already making the Austrian attack look untenable.
French reinforcements arriving already
Still, the Austrians pressed on, the dragoons attacking the hill but being thrown back.  The grenze trying to get through the woods faired no better.
Austrian dragoons get a bloody nose
In quick succession the rest of the Austrians entered the field (all via the road) and the last of the French also came on, this time comprising the Old Guard and some hussars.  Meanwhile the Austrians were still persisting with their weak attack on the hill, as well as advancing curassiers and infantry up the road to try to outflank it and cut off the reinforcements.
View from French lines.  All troops on the table.
However, things did not go well for the Austrians (do they ever?).  The dragoons were pushed back down the hill by fire from the artillery and line infantry and then the curassiers thundered down on them as they stood in a disorganised state.
Austrian dragoons about to cop it.  Old Guard now on the hill as well.
Meanwhile on the French left the advancing Austrians were checked by a sharp and frankly suicidal attack by hussars on the Austrian curassiers.  It did the trick and contained them, whilst the Old Guard was able to invest the hill.
French hussars disordered in front of Austrian curassiers
And at that point after about ten moves, and two and a half hours of play, we had to end it, although it was clear that the Austrians were never going to budge the French.
Austrian dragoons really about to cop it.  Again.
Overall we found the scenario very simple and easy to set up.  Perhaps next time the arrival of French reinforcements should be determined by die throw, because they came on too quickly and too predictably for the Austrians to be able to even be able to develop the attack.

I should also add that we didn't actually use the rules in the One-Hour Games book, which we'd looked at and thought were a bit too simple even for us.  In fact we play-tested David Manley's Fast Play Napoleonic Rules (descibed as "DBA-esque via Fire & Fury"), which did the job but which we'd probably tweak if we were going to use them again.
15mm Roundway hussars
Footnote: troops used were Geoff's and a mixture of very old Hinchcliffe, Roundway, Naismith and Warrior miniatures, which all looked fairly compatible to me.